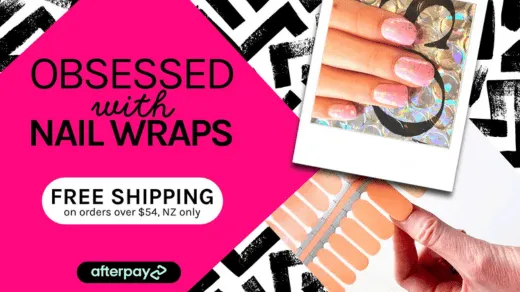
Creating and selling nail wraps can be a creative and potentially profitable venture. Nail wraps are adhesive stickers or decals that can be applied to nails for unique and intricate nail art designs. Here’s a step-by-step guide on how to make nail wraps to sell:
Materials and Equipment:
- Nail Wrap Material: You can use nail wrap paper or clear adhesive sheets. Nail wrap paper is thin and comes in various sizes and designs. Clear adhesive sheets allow you to create your designs and print them on the sheets.
- Nail Polish or Nail Art Supplies: Depending on your design, you may need nail polish, nail art brushes, and other supplies to create your designs.
- Design Software: If you’re printing your designs, you’ll need graphic design software like Adobe Photoshop or Illustrator to create and edit your nail wrap designs.
- Printer: If you’re printing your designs, you’ll need a high-quality color printer capable of producing detailed images.
- Laminating Machine (optional): If using clear adhesive sheets, a laminating machine can help protect and preserve your designs.
- Scissors: For cutting out the nail wrap designs.
- Nail File: To shape and smooth the nail wraps once applied.
Steps:
- Design Your Nail Wraps:
- Use graphic design software to create your nail wrap designs. Ensure they fit the dimensions of the nail wraps or clear adhesive sheets you plan to use.
- Experiment with various patterns, colors, and styles to cater to different preferences.
- Print Your Designs (If Applicable):
- If using clear adhesive sheets, print your designs onto the sheets using a color printer. Allow the ink to dry completely.
- Cut Out the Nail Wraps:
- Carefully cut out each nail wrap design, following the shape and size of a typical nail. Precision is essential to ensure they fit well.
- Apply Adhesive (If Using Clear Sheets):
- If using clear adhesive sheets, apply a thin layer of clear nail polish or adhesive to the back of the design. This will help the nail wrap adhere to the nail.
- Apply the Nail Wraps:
- Clean and prep the nails by removing any existing polish and shaping them as desired.
- Carefully peel the backing off the nail wrap or clear adhesive sheet.
- Position the nail wrap over the nail, aligning it with the cuticle.
- Smooth out any wrinkles or bubbles by pressing gently from the center outward.
- Use a nail file to trim and shape the excess wrap along the nail’s edge.
- Seal and Protect (If Using Clear Sheets):
- Apply a clear topcoat nail polish over the nail wrap to seal and protect the design. Allow it to dry completely.
- Packaging and Marketing:
- Package your nail wraps in an attractive and professional manner. Consider including instructions for application and removal.
- Create an online presence for your nail wrap business through social media platforms, websites, or online marketplaces.
- Promote your nail wraps through various marketing strategies, such as online advertising, collaborations with nail artists, and participating in beauty expos or markets.
- Pricing and Selling:
- Determine competitive pricing for your nail wraps, considering the cost of materials, production time, and desired profit margin.
- Start selling your nail wraps through your chosen sales channels, such as your website, online marketplaces, or local beauty stores.
- Customer Service and Feedback:
- Provide excellent customer service, respond to inquiries promptly, and address any issues or concerns.
- Encourage customer feedback and reviews to improve your product and build trust.
Remember that quality and unique designs will set your nail wraps apart from others in the market. Continuously refine your designs and branding to attract and retain customers.